Basic Herbal Remedy Recipes
Storing Herbs & Remedies
Most remedies will keep best in a cool, dark, dry spot in a tightly sealed container (such as mason jars with the metal lids, dark glass bottles with caps). For most things, a cool dark dry cabinet or pantry works well. These are the enemy of all herbal products: heat, light, moisture, oxygen, introduced bacteria/germs. Of course, more perishable items (fresh/frozen herbs/pastes, soda) need to be stored in the fridge or freezer. Glycerine, honey, syrup, hydrosol, cream, and vinegar extracts might be shelf stable but will keep longer if stored in the fridge or freezer.
Harvesting
- Leaves (or Leaves & Flowers): Look for “happy,” vibrant (perhaps strongly scented) leaves just before or just as the plant comes into flower. For bushy herbs and plants, prune the top 1/4 to 2/3 of the plant, being sure to leave at least a couple sets of leaves on the remaining stems. For more woody plants, prune a few branches here and there. Be sure to allow some of the plants to go to flower and seed. If wild, leave most plants in the population untouched. For example: Mint-family plants, blueberry leaves, raspberry leaves, yarrow aerial parts…
- Flowers: Look for “happy” flowers just as they are opening and preferably before they are pollinated. Pinch them off. It’s usually ok if a leaf or two falls in. Harvest no more than half the flowers of a cultivated plant, less of a wild plant. For example: St. John’s wort, chamomile, calendula…
- Bark: Preferably harvest in spring or fall when the sap is moving through the stems. Before the leaves come out or just after they turn color and begin to drop. Prune a few young branches up to a diameter of about 1.5 inches. Shave off the bark (young outer – usually brown or gray, and inner – usually green) with a sharp knife to use for medicine and discard/compost/use in crafts the woody inner pith. With these younger branches, you don’t need to worry about the outer bark – it can be used in medicine. For twigs, there is no need shave the bark – simply chop them up. For example: black birch, wild cherry and chokecherry (fall only), witch hazel, oak, viburnum species…
- Roots: Preferably harvest in spring as soon as the ground softens and you can positively identify the plant or in the fall once the plant begins to die back. For biennials (burdock, yellow dock, mullein), don’t harvest the roots after the plant has flowered. Dig up the roots with a fork, shovel, or digging stick. Remove tops (to use or compost) and scrub the roots clean with a potato scrubber in cold water. Except for very invasive species, be very careful not to harvest all the roots in a population. Some plants may require about four growing seasons before the roots are optimal – echinacea, most Chinese and Ayurvedic roots. For example: dandelion, valerian, elecampane, echinacea…
- Fruits: Harvest once they are fully ripe, in perfect color, sweetness, and flavor. Some are better/sweeter after a frost (autumn olive, rosehips, cranberries). You should remove the seeds of some before consuming, for safety – wild cherries, elderberries – by manual removal, food mills, and/or pressing the pulp and juice through fine mesh. Don’t harvest rotten or buggy fruits. For example: black elderberries, wild cherries, rosehips, grapes…
- Seeds: This can be the most difficult harvest since most seeds are too small to harvest abundantly by hand. Once the plant has gone to seed, pick the tops of the plants and hang the seedheads upside down in a brown paper bag until dry. Shake and pull out seeds. For example: Fennel, dill, coriander, plantain…
Drying Herbs
Harvest herbs regularly, which will encourage new and bushier growth—plus more herbs for your kitchen! Ideal trying temps are 95 to 110°F with good airflow and/or low humidity (higher humidity needs higher heat). Loosely place recently harvested herbs—stems and all—in a brown paper bag. (It’s not necessary to wash but discard any dirty or damaged leaves and bugs first.) Fold shut and let sit in the windshield of your car for 1-3 days. Check daily for dryness. The leaves will crumble easily between your fingertips when ready. Immediately remove the leaves from the stems or “garble” the herb w/hands until cut and sifted. Compost stems and store leaves in glass in a cool, dark, dry place.
Alternate drying options – particularly superior for delicate herbs and HOT HUMID weather: hang in loose bundles or dry in single layer on a rust-proof screen with a fan underneath. I use an hanging herb drying rack. In humid conditions, these will not dry 100% and will need to be crisped in the dehydrator or car before garbling and storing. You may also use a dehydrator with a controllable thermostat set to 95 to 110°F.
Garbling: This is the term for processing your dried herbs. When the herb crumbles easily between your fingertips, it’s time to remove the bag. Strip the leaves off the stem (if you haven’t already). Quick video here on FB. Note how crunchy the herbs sound.
Herbal Teas & Water Extracts
Herbal Infusion (Steep): This method is best for delicate parts of a plant, leaves and flowers. When you make tea from a teabag, you’re making an infusion. Use 1 tsp to 1 Tbsp of dried herb per cup of water. Cover and let steep for 5-20 minutes, strain, and drink. Larger amounts of herb and longer steeping times make stronger tasting teas, less herb and time makes a lighter tea.
Infusion Variations
- A Strong Tea Infusion (for potent medicinal teas, particularly those that are mineral-rich “nourishing” and tonic, food-like, and very safe) is approximately 1 ounce herb steeped in a 32-ounce jar of hot water for 4+ hours or overnight. Use a French Press or squeeze through a cloth to get as much tea as possible.
- For Fresh Herbs (aromatic from the garden) use 2-3 times more herb, cover, let steep 30+ minutes.
- Iced Tea: Either refrigerate your regular tea after it’s been brewed, or make it double-strength then pour over ice.
- Cold Water or Seltzer Infusion: Steep a few fresh aromatic or flavorful sprigs of herbs in cold water or plain seltzer for 5 minutes to 2 hours. Add liquid sweetener if desired. Drink immediately within the day.
Herbal Decoction (Simmer): The decoction method is best for harder parts of herbs, roots, bark and seeds. These parts of the plant often make a week tea if only allowed to infuse; simmering/decocting gets their properties out faster. Use 1 tsp to 1 Tbsp of dried herb per cup of water. Simmer for 5 to 20 minutes, strain, and drink. Larger amounts of herb and longer steeping times make stronger tasting teas, less herb and time makes a lighter tea.
Think Beyond the Teapot ~ Soup, Broth, and Beyond: You can infuse or decoct herbs in other things than tea! Also use these basic methods for milk, cream, soup/broth, wet ingredients for recipes, etc. Soup is a tea! Tonics, nutritives, mushrooms.
Freezing Herbs
Some herbs can simply be placed in a freezer bag and tucked into the freezer with good results: lemongrass stalks, chives, tarragon. It’s still good to try to remove as much air as you can. Herbs that bruise and blacken easily (basils, lemon balm) will do better if you vacuum seal them in individual serving size bags. Consider a Seal-A-Meal or Food-Saver machine. For individual use, you can also try adding chopped herbs to ice cube trays and then covering with water or cooking oil. Baby food storage trays work well.
- ·Frozen Herbal Paste – Some herbs like parsley, cilantro and chives loose too much of their flavor once dried. For these you can puree them fresh with olive oil. Sweeter herbs like mint and lemon balm can be pureed with canola oil for future baking ventures. Put the mix in Ziplock bags and then pull chunks off as needed.
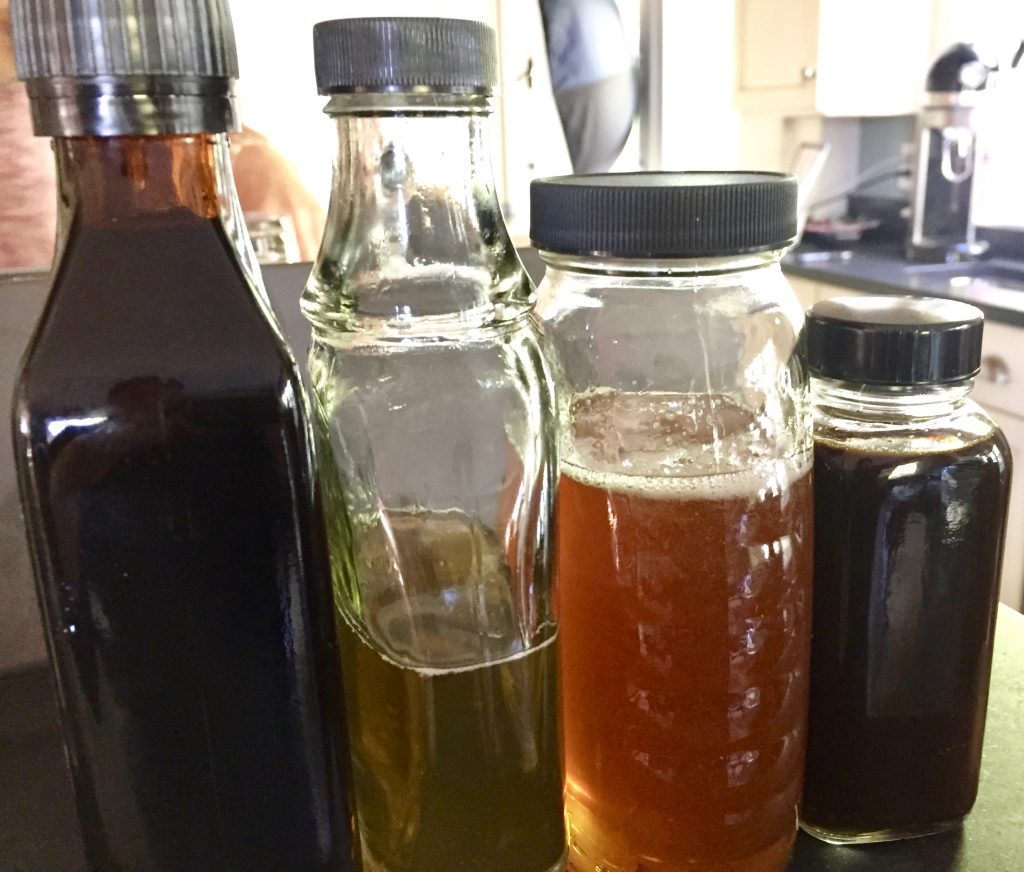
Extracts
Simmered Syrup Concentrates
(also frozen concentrates, concentrate fruit leather) check out this blog and video
Herbal Honey
Cooked: Chop up your fresh or dry herb. If the herb is very juicy, you may want to wilt the herb in a hot location (out of direct sun) for a day. Per 1/2 cup of chopped herb (volume), add 2 cups of honey (volume). Bring to a gentle boil, shut off, and let cool. Repeat at least once and up to 3 times each day for 3 days. After the last heating, pour the warm mixture through a strainer and into jars. This works well for tasty and aromatic herbs, such as lemon balm, anise hyssop or mint, as well as those used as expectorants or cough/cold remedies such as bee balm, thyme, ginger, fresh spring pine branches.
Watch a short honey video here!
Raw: Chop up your herb and loosely pack it in a jar. Cover with honey to the top. Put on a tight lid. Every day (approximately), turn the jar. When it tastes good (few weeks or so), plunk the jar in warm water to get the honey runny, then strain it through a fine mesh strainer, pushing as much out as you can with a spoon.
For Both Methods: If it’s watery, store in the fridge and use within a few months. If it’s thick like honey, it should be shelf stable for a year or so.
Herbal Vinegar
Chop up your fresh herbs. Loosely pack a jar and cover them with vinegar. Let it sit for at least one month, strain, and use as desired. You may opt to put a whole sprig of herb into a finished vinegar for visual appeal. White distilled and rice vinegars have a somewhat neutral flavor and clear color that ultimately show off the individuality of the herbs in the finished product. Chive blossoms make a lovely and delicious pink vinegar. Also consider tarragon, fennel… Apple cider vinegar has its own healing properties and works particularly well for nutritive vinegars and fire cider. Use a PLASTIC cap/lid! Generally shelf stable for 1-2+ years.
Oxymel: Use a mix of honey and vinegar. Feel free to sub in sugar/simple syrup or glycerine for honey. Or use maple syrup or molasses, but these will be less shelf stable.
Tincture (Alcohol Extract)
Fresh Plant Tincture: Chop up fresh herbs or roots, and stuff them in a mason jar until you can’t fit any more. Fill the jar to the brim with whole grain alcohol or high proof vodka or brandy. A day later, top the jar off again. Leave the jar in a dark place for at least one month (or as long as you like). Strain it out with a fine mesh strainer and muslin or cheesecloth to squeeze out the last bit. This method will give you approximately a 1:2 fresh herb extraction, meaning that for each ounce (weight, as shown on a kitchen scale) of herb, you add 2 ounces (volume, as shown on a glass measuring cup). Most herbs do well with a fresh tincture: lemon balm, echinacea, valerian… Most tinctures are shelf stable for up to 10 years, then lose potency.
Dry Herb Tincture: Powder your herb in a food processor if it isn’t already in powder form. Per 1 oz (weight on a kitchen scale) of herb, add 5 ounces of alcohol/water mix. (Do NOT use whole grain alcohol unless you dilute it with distilled water.) The ideal alcohol/water ratio will vary by herb, but 40-60% (80-120 proof vodka or brandy) works for most herbs. Add about 10% vegetable glycerin for high tannin herbs like cinnamon. Combine your ingredients in a mason jar and shake your mixture as often as possible, aiming for 2xs/day. After no less than one month (more is fine), strain the mixture through a coffee filter-lined strainer. This is a 1:5 dry tincture. It works well for some aromatic herbs such as lavender, but is most often used for herbs that are primarily available dry: cinnamon, chocolate, cardamom, astragalus…
Decoction Tincture Method: This is a variation on a dry tincture a.k.a. Double Extraction Tincture. Some herbs, especially roots, and mushrooms, extract better with heat. Ginseng-family plants fall into this category. This is also better for extracts that do not need high alcohol percentage. For example, mucilaginous plants like comfrey, slippery elm, and marshmallow (notoriously hard to tincture) do well with this method. Echinacea, astragalus, and medicinal mushrooms—all rich in polysaccharides—are better with this method, too. Simmer you roots for 1-3 hours. When done, pour the hot mixture into a mason jar and add alcohol, cap, and let sit (macerate) for at least 1 month, shaking daily (once it has cooled). Ultimately you’ll want at least 30% alcohol to prevent your formula from growing mold and bacteria. Keep this in your measurements. For example, per 1 ounce herb (weight), simmer in 3 ounces of water, then add 2 ounces of whole grain alcohol. Or, per 1 ounce herb (weight), simmer in 1 ounces of water, then add 4 ounces of high proof vodka. For more on this tincture method, click here for a whole blog post with charts, calculations worksheets, and more.
Also get a free Percolation Tincture Video with handout/worksheet/close up photos.
Herbal Cordial: There are many variations on this. Make Simple Syrup by simmering 2 cups of sugar with 1 cup of water until clear. Loosely fill a jar with fresh herbs or fruit. Cover with the simple syrup and 1 1/2 cups or more of good quality, high proof vodka or other desired neutral alcohol. Cover, shake, and let sit for at least one month or until desired flavor is reached. Strain and store in the cupboard for special events and a delicious dessert! Great for vanilla (1 bean per 1-2 cups), licorice-y plants (anise hyssop, anise, fennel), lemony plants (balm, grass, mint, thyme, verbena), mints of all kinds, fruits of all kinds. Best w/in 1-2 years.For more on cordials, click here.
Glycerites (Glycerine Extract)
Glycerine is inferior to an alcohol tincture in terms of extraction, potency, and shelf life, and glycerine is very expensive and highly processed. However, it is alcohol-free, sugar-free, safe for diabetics and has a sweet, more pleasant taste. It does a nice job extracting aromatics. (Vinegar, honey, oxymel, vinegar-glycerine, capsule, powder, tea are other alcohol-free options.) Dose generally closer to 1 teaspoon vs 1 ml. There are three basic methods for making a glycerite. Best to use sanitized equipment. Dry herb is less likely to spoil than fresh herb. Usually keeps 1 year. Longer shelf life in fridge and with dry herb.
- Maceration: Same method as making a tincture, using 100% glycerine for fresh plant material and 60-70% glycerine (cut with 30-40% distilled water) for dry plants.
- Simmered Still: From Steven Horne, use the same proportions/percent as above but leave 1 inch headspace in the jar. Use a canning jar lid, and simmer submerged in water (like you’re canning it) for 15+ minutes. Remove, cool, strain. See Thomas Easley’s video here.
- Glycerine Transfer: Take a finished alcohol extract, equal parts, and pure glycerine. For example, 1 oz glycerine and 1 oz tincture. Simmer in double boiler in a well-ventilated area until your volume goes back to 1 oz (all the water and alcohol have evaporated).
Hydrosol (Flower Water)
Use a large stainless steel pot. Fill with a few inches of water. Put a clean brick in the middle and a bowl on top (or use a bowl that will stay put and not float around in the water). Place several fistfuls of herb material in the water around the bowl. Put the pot lid on upside down and fill with ice to promote condensation (I freeze water in a metal mixing bowl and put this on top of the lid – it’s les messy). Simmer until you have about 4 ounces of flower water in the bowl. This should keep for about one year on the shelf.
Herbal Oil (Topical)
You have to be careful with culinary herbal oils because herbs may harbor botulism spores that naturally occur in soil and thrive in an anaerobic oil environment. While rare, it can happen. Most culinary oils are best made on the spot and consumed within one week. OR, consider making an herbal paste (above) and keeping it in the freezer. I am more apt to make oils for bodycare purposes, techniques below, although the same techniques could be used for culinary oils as well. Olive oil is the herbalist’s choice for medicinal and most culinary oils. However, coconut, grapeseed and other oils may also be used.
To Make a Salve or Lip Balm: Melt 1 oz beeswax in a double boiler. Add 4 oz oil(s). Stir to combine/melt, add 10-20 drops essential oils if desired, then pour into heat-safe containers. Shelf life: 1 year+.
- Alcohol-Intermediary: My favorite, as taught by Michael Moore! For dry herbs only. Grind up herb in a blender. Per 1 oz of herb, mix in 1/2 oz of grain alcohol. Mix in to the herb, it will have a consistency similar to beach sand or potting soil. Cover and let sit overnight or as long as desired. Pour into blender, Per 1 oz of starting herb, add 7 oz of oil. Blend in blender until the blender gets warm, about 5-10 minutes. Strain.
- Maceration Method: For dry herb, per 1 oz of ground or cut/sifted herb add 4-8 oz of oil, mix in blender and pour in jar. For fresh herb, wilt to half its weight in water, loosely pack in a jar, and then cover with oil (at least one inch above or to the tip top of the jar). Place the jar in a warm spot—for example a sunny window, warm car, or oven with a pilot light—for 2 weeks. If the spot is sunny, cover the jar with cloth or a brown paper bag. Strain.
- Heat Method: Use the same proportions mentioned above for dry or fresh herbs. Pour into double boiler or crock and let sit at the lowest setting (ideally around 90-110 degrees, although the lowest setting may be warmer) overnight or up to three days. Strain.
For more on herbal oils (including oil and salve videos!) and bodycare recipes, click here.
Straining Herbal Remedies (All Methods)
Place a fine mesh strainer over a bowl and line with cheesecloth or a clean, non-absorbent cloth/jelly bag. Or use a fine mesh metal strainer and press with a large spoon. Pour the herb mixture through. Wring the extract out of the cloth and compost the herbal dregs. If desired, let sit and decant for desired clarity and/or strain further through a coffee filter. Pour into dark glass bottles and store in a cool, dark, dry spot.
Powdering Herbs
Some herbs powder more easily than others, particularly leaves and flowers. Grind your cut-sifted dry herb in a bullet blender or other blending apparatus (coffee grinder, Chinese stainless steel grinder, blender, Vitamix, mortar and pestle… I use a Nutribullet Pro). Then sift through fine mesh stainless steel hand strainer. Powders can be mixed into honey (= electuary), added to hot milk or cocoa, mixed in with honey and nut butter balls, added to smoothies, etc. It will not dissolve and loses potency quickly but is convenient and affordable. 1 teaspoon of powder = 4-10 pills.
Capsules
Start with dry, powdered herb. If you have cut/sifted herb, grind it in a coffee grinder/bullet (then sift through a fine mesh strainer if you’d like). Using a capsule machine or your hands, fill the bottoms of empty capsules (I like “00” veg caps – make sure your machine matches). Snap on the top cap. Store in a glass container in a cool dark, dry spot for up to one year. One full “00” cap is about 400-500 mg.
Click Here for an easy-print shorter version of these recipes.
Clinical herbalist Maria Noël Groves sees clients and teaches classes at Wintergreen Botanicals Herbal Clinic & Education Center in Chichester, New Hampshire.
The statements made on this blog have not been evaluated by the FDA and are not intended to diagnose, prescribe, recommend, treat, cure, or offer medical advice. Please see your health care practitioner for help regarding choices and to avoid herb-drug interactions.
Most recent updates 3/28/24